Succeeding in his fishing knot is part of the béaba to know how to master for a fisherman. Here is a selection of fishing knots that are easy to make, whether on a lure, a swivel or between the leader and the main line.

The lighter knot: the easy fishing knot for connecting a fluorocarbon to a lure
The lighter knot is a fishing knot that was shown to us by our friend and fishing guide Julien Audonnet during our stay in Guadeloupe. To our great surprise, this fishing knot proved to be as reliable as it was easy to tie throughout our fishing trip. This 'lighter' fishing knot allows you to connect a large-diameter fluorocarbon (over 50/100) to your lure.
This fishing knot is therefore perfect for heavy fishing such as pike or even exo. The only requirements you should have with you is fluorocarbon 100% as well as a lighter.
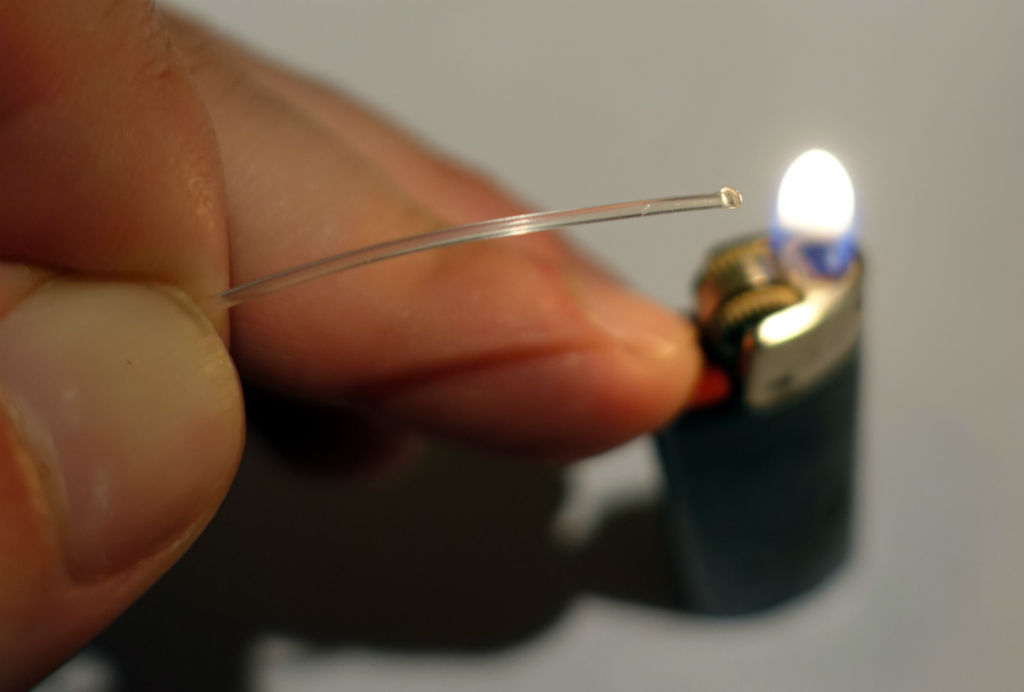
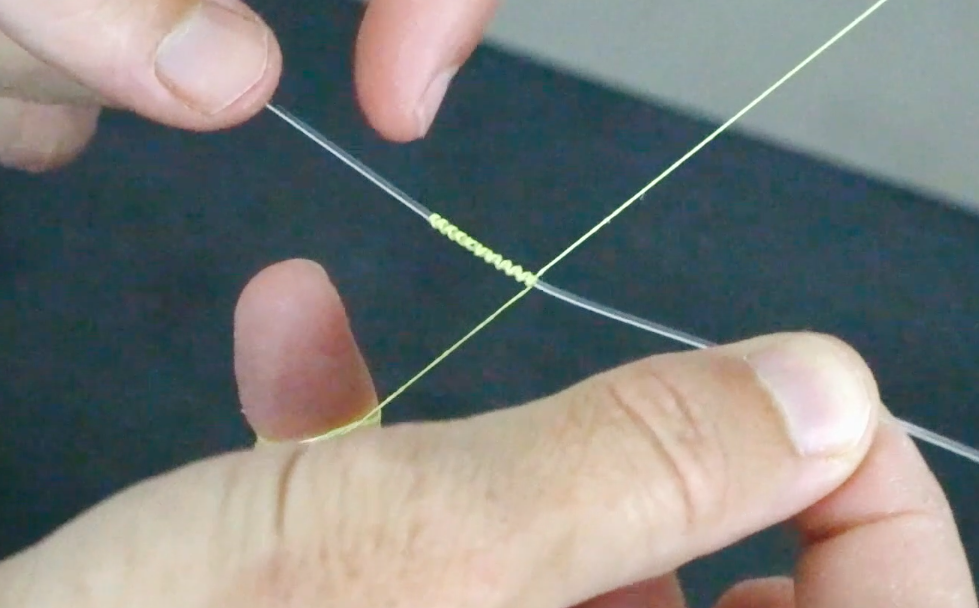
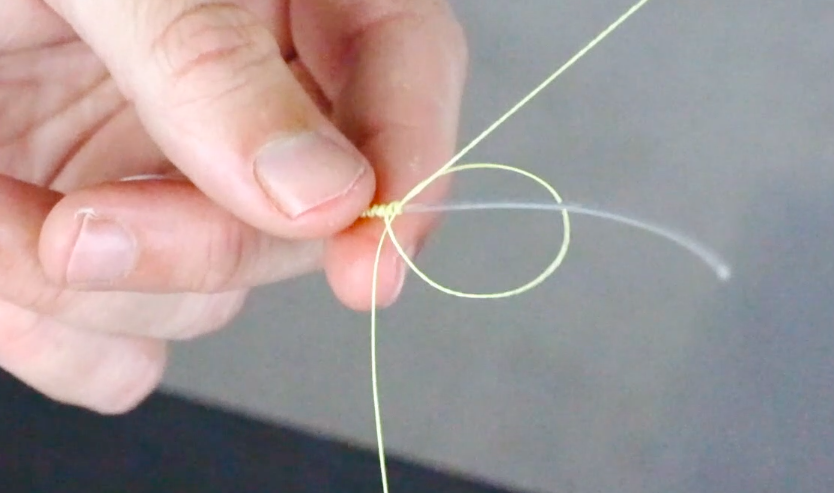
Realization of the lighter knot in pictures
- Take a lighter and heat the end of the fluorocarbon to melt it and form a small mushroom.
2. Tie a simple knot two or three centimeters from the mushroom, without tightening the latter.
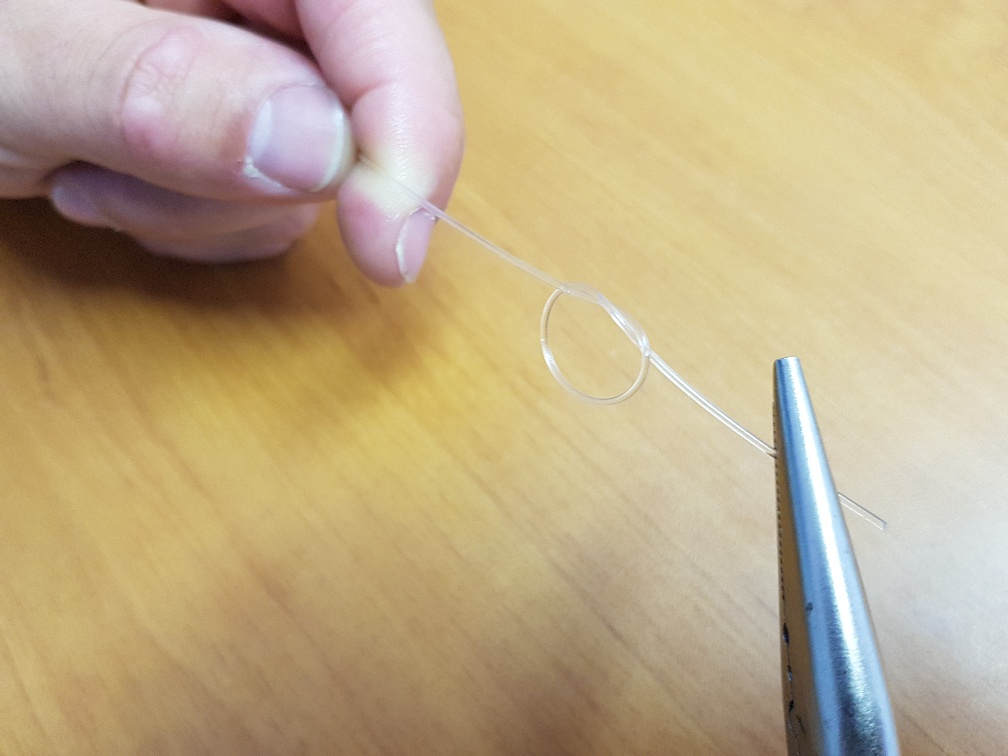
3. Pass the mushroom through the lure attachment, then pass it through the previously formed single knot.

4. Tighten the simple knot which blocks the mushroom and locks the loop.
Making the lighter knot in video
The Albright knot: the connecting knot between braid and nylon
The albright knot is certainly the most used fishing knot by lure fishermen, whether in France or abroad. This fishing knot is used to connect a braid to a fluorocarbon or nylon leader. Easy to make, this fishing knot goes relatively well in the rings on small and medium diameters of fluorocarbon. This fishing knot comes for us in addition to the FG knot if for any diameter of fluorocarbon or nylon not greater than 50/100.
Realization of the Albright knot in pictures
- Make a wide loop with the leader and pass the braid through it for 10 to 15cm.
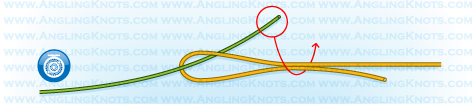
2. Wrap the braid around the loop for about ten turns while coming back to the loop.
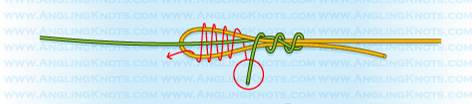
3. Pass the excess thread through the loop
4. Tighten the knot by simultaneously pulling the strand of free braid and the leader. Cut the excess braid and leader

Realization of the Albright knot in video
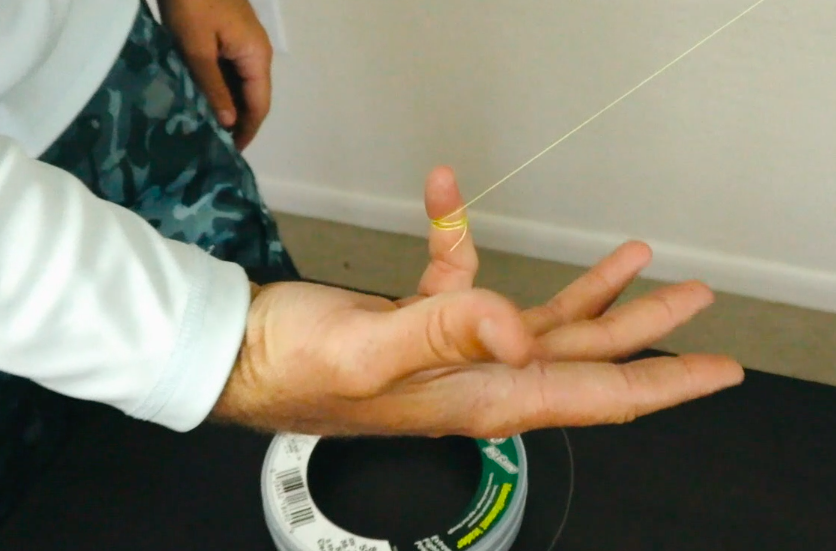
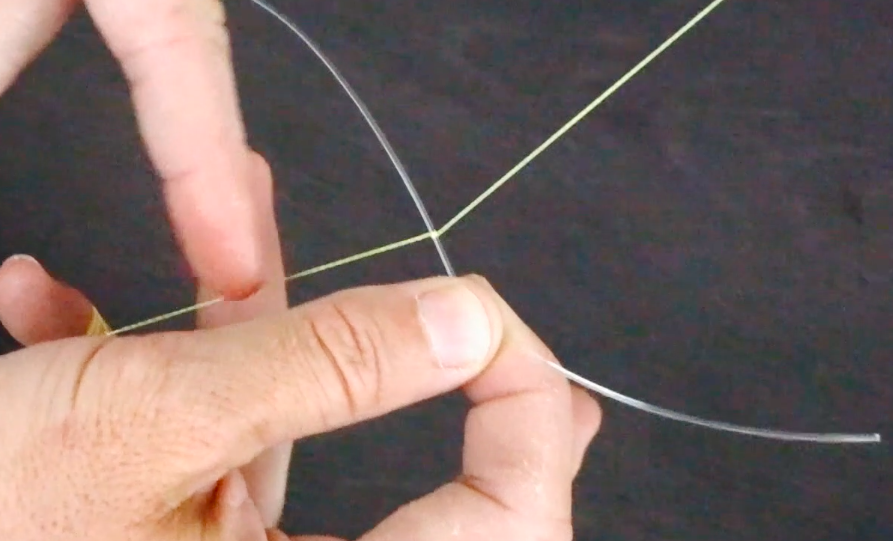
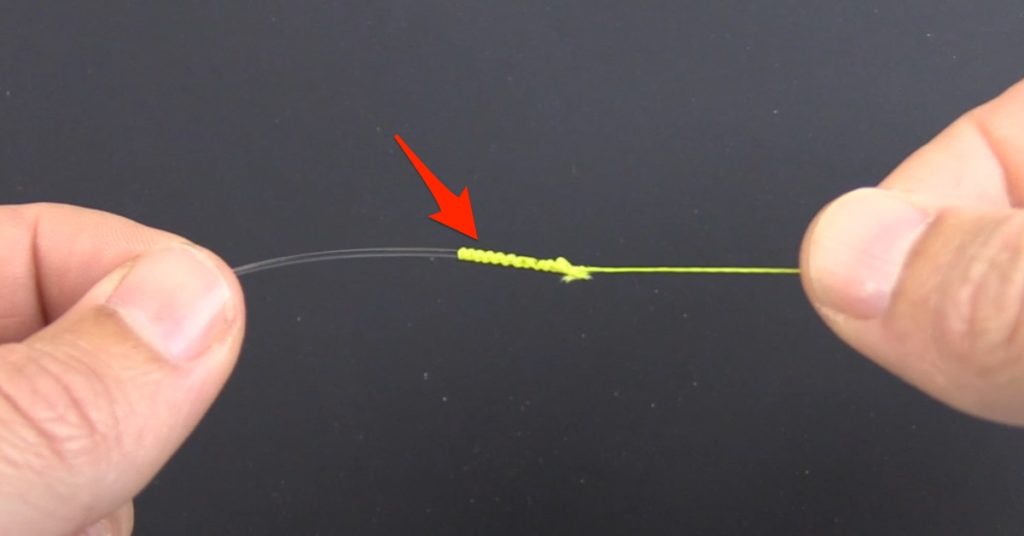
The FG knot: the fishing knot for connecting braid and fluorocarbon
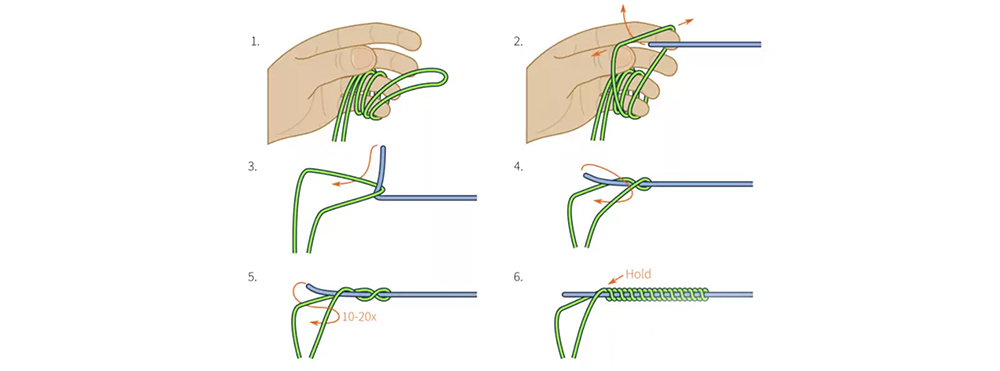
The FG knot is a fishing knot for fluidly connecting the braid to. a large diameter fluorocarbon. With the FG knot or "Fine Grip knot", the diameter of the knot is drastically reduced compared to another fishing knot. This allows for better fluidity when the knot passes through the rings. We can therefore afford to extend the length of the leader and ensure better discretion.
However, it is quite long and complex to master at the start. Also, we advise you to make this fishing knot first in peace at home on all your rods in order to avoid the galleys once in fishing action.
Realization of the FG knot in pictures
- Wrap the braid around the index finger then the little finger by making a bridge. Make enough turns on each finger so that the braid does not slip.
2. Pass the fluorocarbon through the bridge formed between the fingers. Make a U-turn with the wrist and pass the fluorocarbon again through the bridge formed between the fingers.
3. Repeat the operation 10 to 20 times, alternating back and forth until the braid no longer slips on the fluorocarbon. Be sure to keep constant tension during this operation.
4. With the remaining braid, make several loops around the fluorocarbon to tighten the peach knot.
6. Cut the fluorocarbon 3 mm from the braid
7. Make about 5 to A new loops around the braid
8. Take a lighter and burn the excess fluorocarbon.
Realization of the FG knot in video
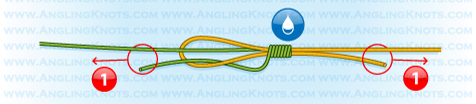
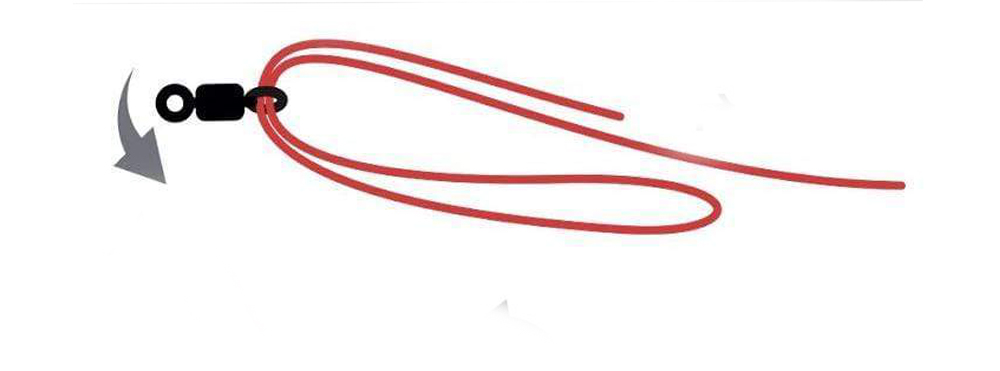
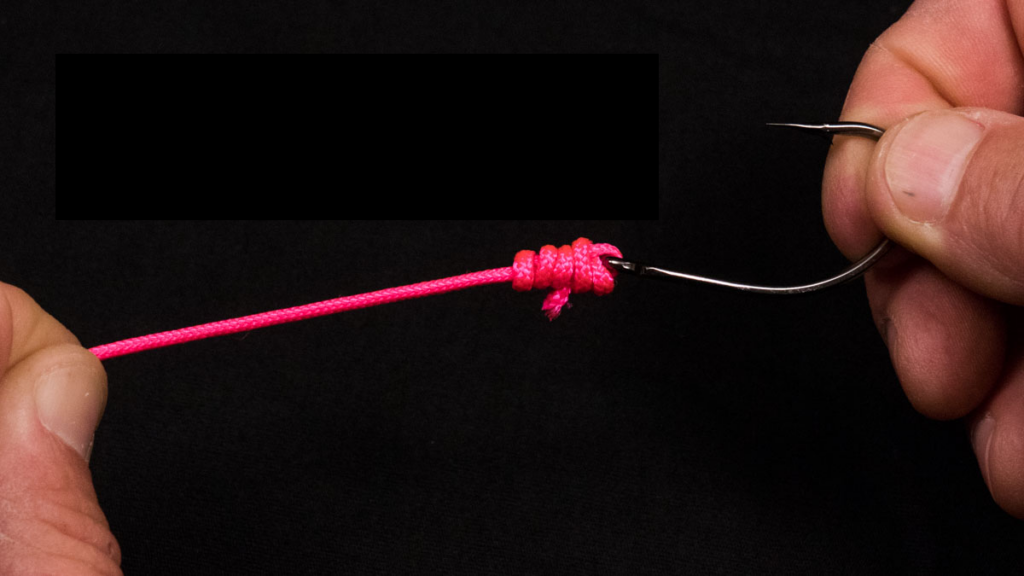
The Palomar knot: The fishing knot to connect a line to a swivel
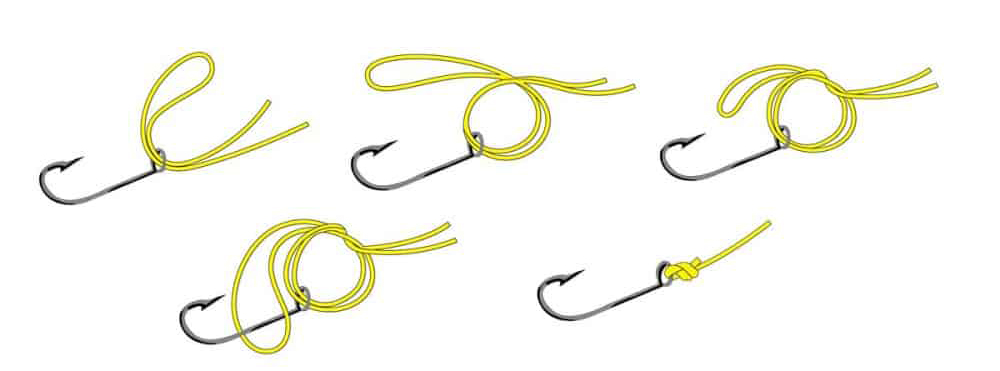
The Palomar is one of the most famous fishing knots for lure fishermen. The "Palomar" fishing knot allows you to connect a line to a swivel, a hook or even a staple.
This fishing knot has built its fame on its strength but above all on its speed of execution. It is a very versatile knot, which can also be used on nylon, fluorocarbon or braid. On the other hand, it is a complicated fishing knot to use on large diameters of wire or small eyelets.
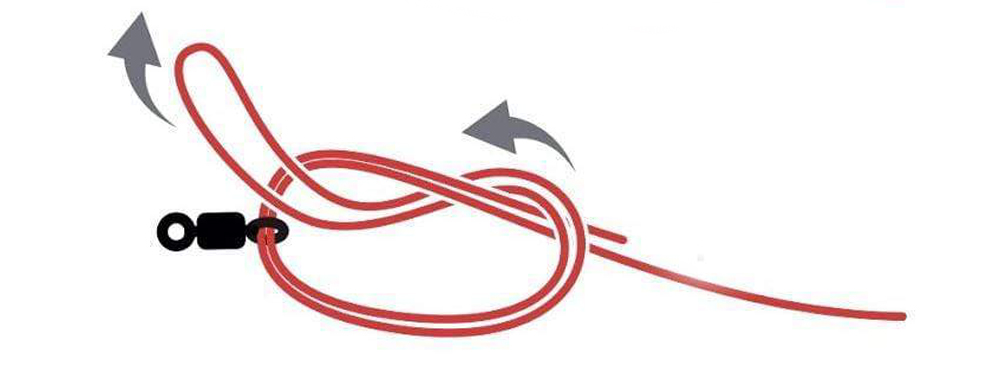
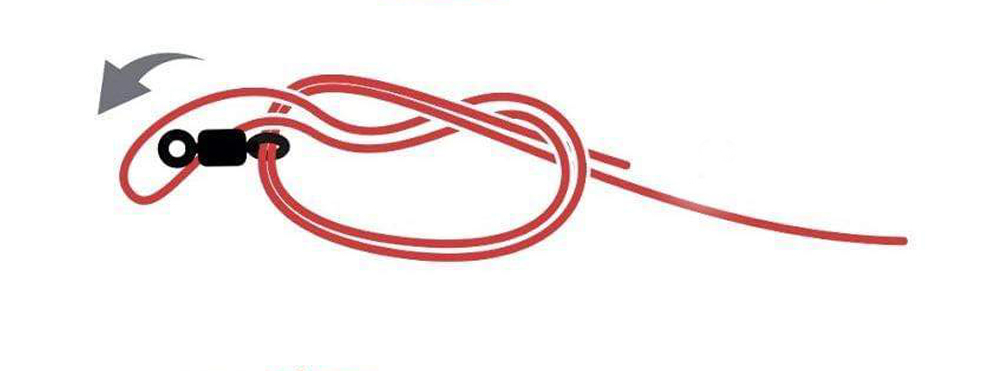
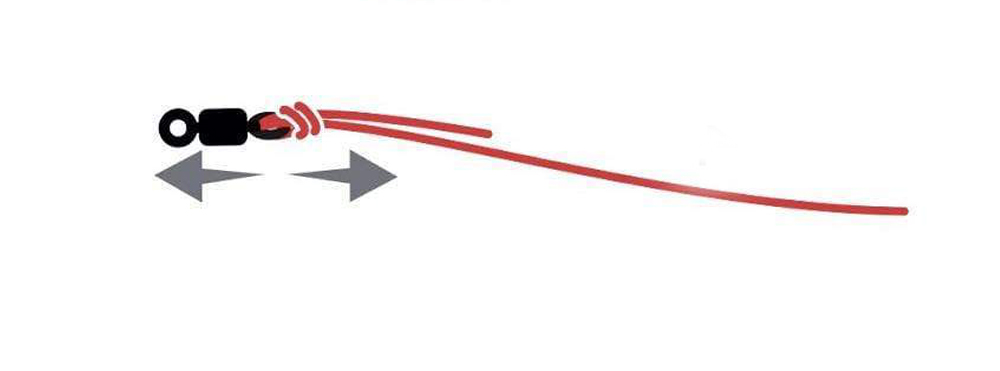
Realization of the Palomar knot in pictures
- Make a loop at your line and pass it through the swivel, hook or staple to be connected
2. Make one or two loops, taking care to include your swivel, hook or staple.
3. Pass your swivel, hook or staple through the loop
4. Tighten the palomar knot and cut off the excess thread
Video realization of the Palomar knot
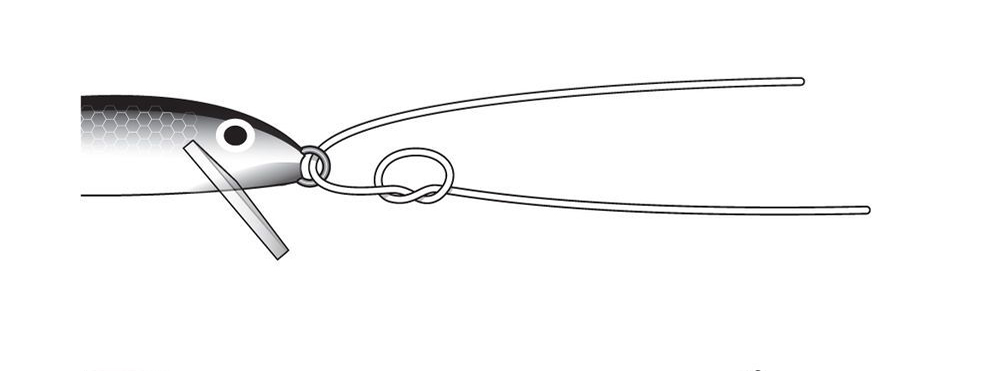
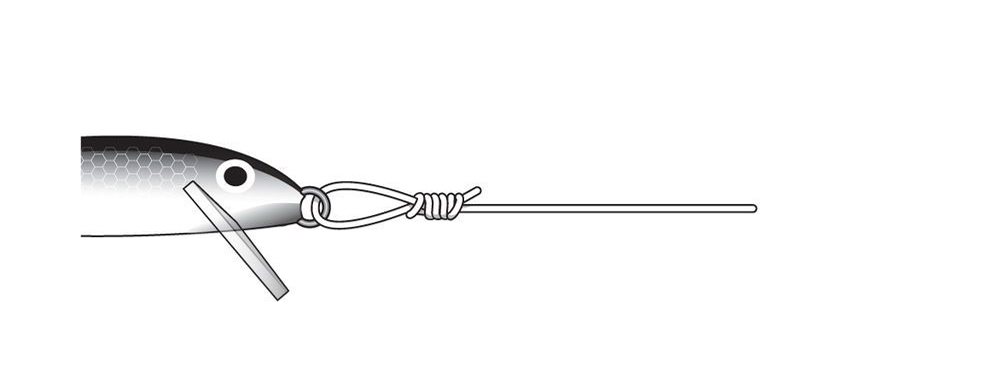
The Rapala knot: the fishing knot for connecting a line to a lure
The Rapala knot is a fishing knot also essential when fishing with a lure. This easy-to-reproduce fishing knot allows a lure to be connected to a line, while retaining the mobility advantages provided by a hook. It is also more discreet than a staple. It is an ideal fishing knot for lures with strong wobbling or rolling like crankbaits, jerkbaits or even swimbaits.
In our opinion, the Rapala knot comes in addition to the lighter knot when we go over smaller fluorocarbon diameters. The only downside that can be seen in this fishing knot is that it forces you to re-tie the knot every time you want to change lures.
Realization of the Rapala knot in picture
- Make a loop with your line between 5 to 10 cm from the end of the latter and pass the end through the eyelet of your lure
2. This time, pass the end of your thread through the loop initially formed.
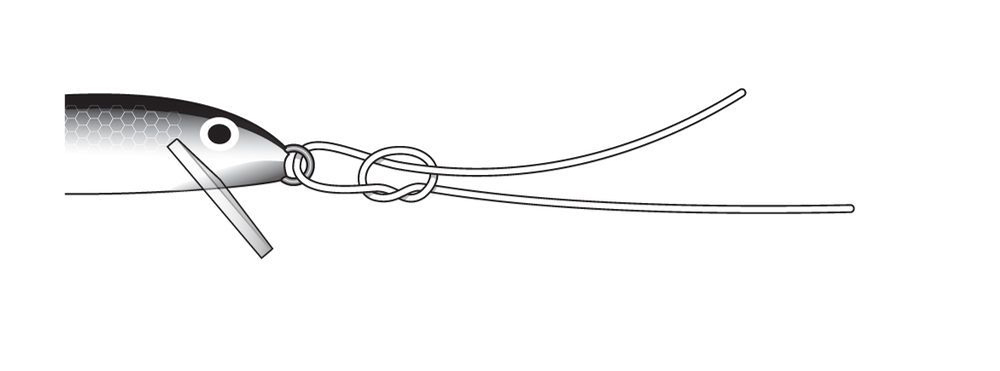
3. Wind the wire 4 to 5 times around the main line
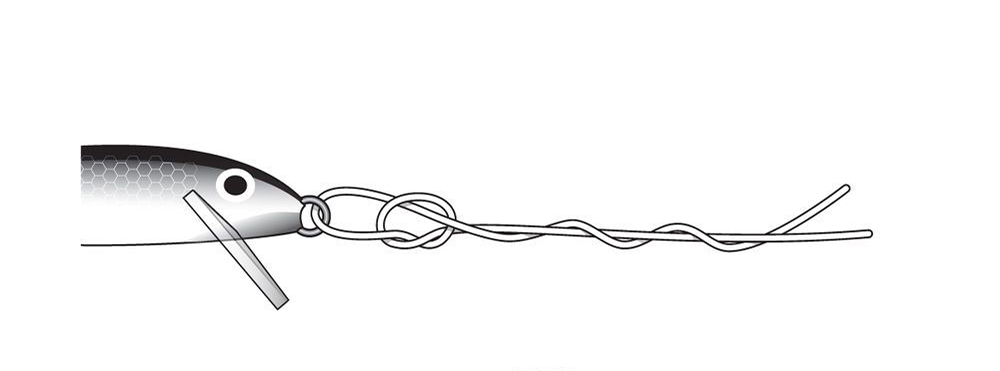
4. Iron the end of the wire through the loop
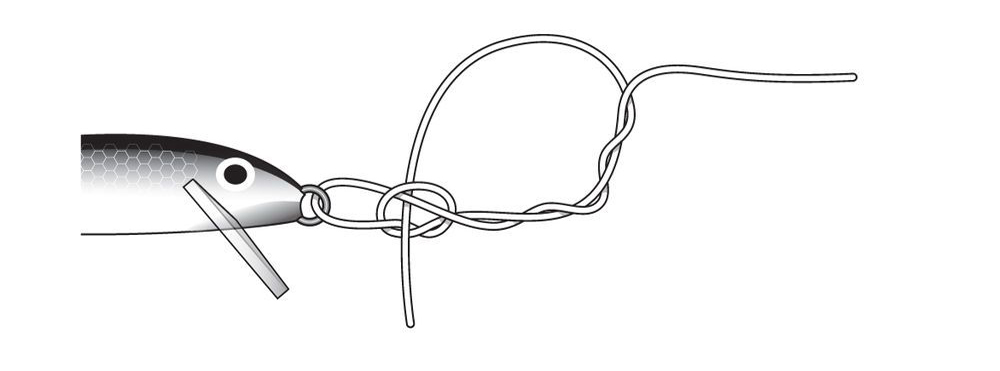
5. Pass the end of the thread, this time through the loop formed in the upper part of the knot.
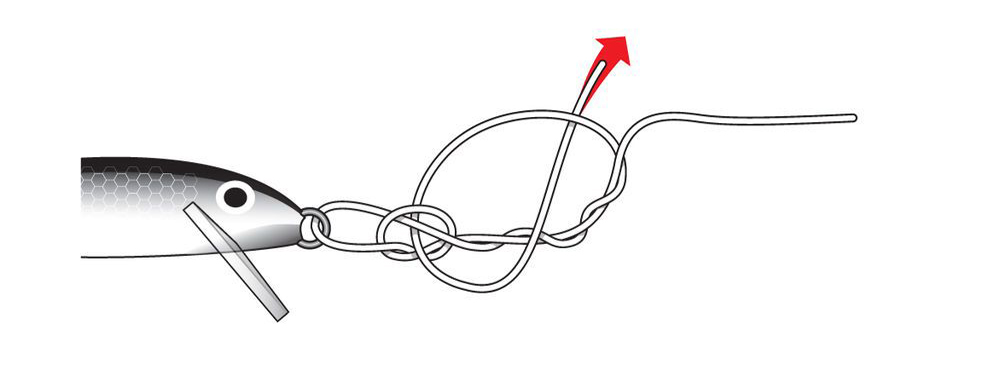
6. Moisten the assembly, tighten the knot and cut the excess thread.
Making the Rapala knot in video
Want to learn more about putting a fishing knot into practice?
Our fishing guides are also there to advise you in the selection of your node and your equipment in general. In their company, you can practice several lure fishing techniques and try your hand at making the fishing knots mentioned. So don't hesitate to get in touch with them. There is nothing better than practice to help you in your choice.
Useful links to start lure fishing:
Braid or nylon: Which line to choose for lure fishing?
Casting or spinning: which choice to adopt?
Which fishing rod to choose according to the lure used?

Pingback: Boat Box System Xtroller V2: Understand everything about its installation
Pingback: FG knot: making a perfect FG knot - The Rodmaps Blog
Pingback: Palomar knot: the easy and reliable fishing knot - The Rodmaps Blog
Pingback: How to fish for black bass in summer? - Rodmaps Blog
Pingback: Rapala knot: The steps to make a rapala knot
Pingback: Black bass lure: 5 black bass lures to choose from during the summer
Pingback: Asp lure: 3 essential lures for asp fishing
Pingback: Swimbait: everything you need to know about swimbait fishing - The Rodmaps Blog